Chocolate Treats for Any Occasion
Highlighted under: Sweet Traditions
I absolutely love creating these Chocolate Treats for Any Occasion, as they always bring smiles to friends and family. Whether it’s a casual get-together or a festive celebration, these treats never fail to impress. The rich chocolate flavor harmonizes beautifully with various textures, and I find that they appeal to both adults and kids alike. Plus, the best part is how simple they are to make in just a few steps. With a hint of creativity and some basic ingredients, you can whip up a delightful batch that showcases your love for chocolate!
My journey with these delicious chocolate treats began on a rainy afternoon when I was craving something sweet and comforting. I decided to experiment with various chocolate recipes I had come across, aiming for a flavor that would stand out. After a few tries, I nailed the perfect combination of rich chocolate and a hint of espresso, and my family couldn’t get enough of them!
What makes these treats so special is their versatility. I love to play around with toppings—sometimes I drizzle caramel over the top or add a sprinkle of sea salt to enhance the chocolate's richness. This method allows me to customize each batch, making them perfect for any occasion. Trust me, once you’ve tried these, you'll want to make them every week!
Why You'll Love These Chocolate Treats
- Decadent chocolate coupled with creative toppings for customization
- Quick and easy to prepare, perfect for last-minute occasions
- Irresistible flavors that please both kids and adults
The Role of Ingredients
Understanding the ingredients in this recipe is key to achieving the best results. The dark chocolate is not only the star of this treat but also affects the texture and flavor. Look for high-quality chocolate with at least 70% cocoa for a rich, deep flavor. The unsalted butter adds richness and moisture, which is essential for the fudgy center of the treats. If you're vegan, consider substituting the butter with coconut oil and the eggs with a flaxseed meal mixture.
The addition of eggs is crucial for binding the ingredients together and adding structure. When you whisk the eggs and sugar until pale and fluffy, you're incorporating air, which will help provide a light texture despite the overall fudginess of the treats. If you want to make egg-free versions, you can use applesauce or mashed bananas, though this will change the flavor profile slightly. Just remember that these substitutes may also affect baking time slightly.
Perfecting the Baking Process
When baking, make sure to preheat your oven to 350°F (175°C) to ensure even baking. This temperature allows the chocolate to set properly without drying out. Keep an eye on the treats towards the end of the baking time; they should look glossy on top and have slightly firm edges. A toothpick inserted into the center should come out with a few moist crumbs for that perfect fudgy consistency. If you overbake, the result will be dry and crumbly, which we definitely want to avoid.
Once the baking is complete, don't rush the cooling process. Let the treats sit in the pan for about 10 minutes before cutting. This not only will firm them up slightly but also makes them easier to handle. If you're looking for clean cuts, I recommend using a sharp knife dipped in hot water. The steam helps the knife glide through the chocolate treats smoothly.
Topping and Variations
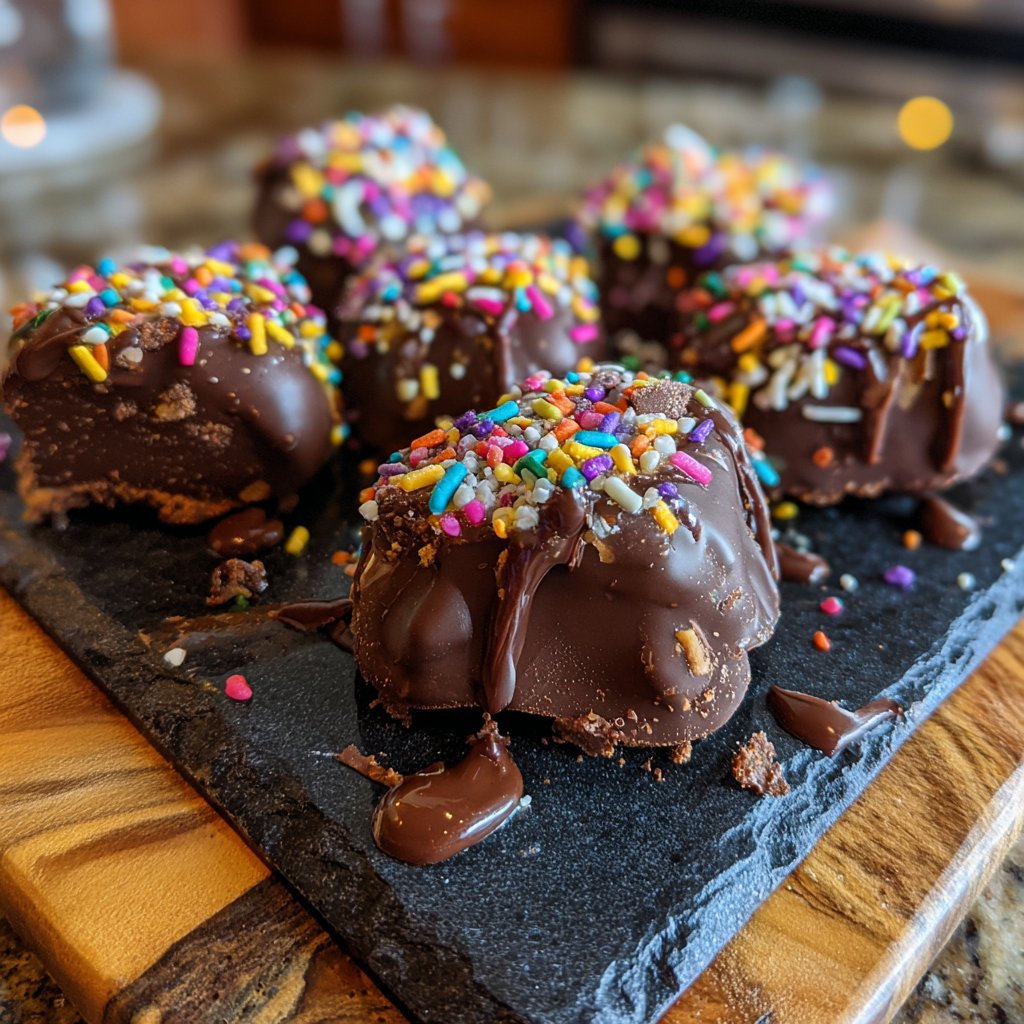
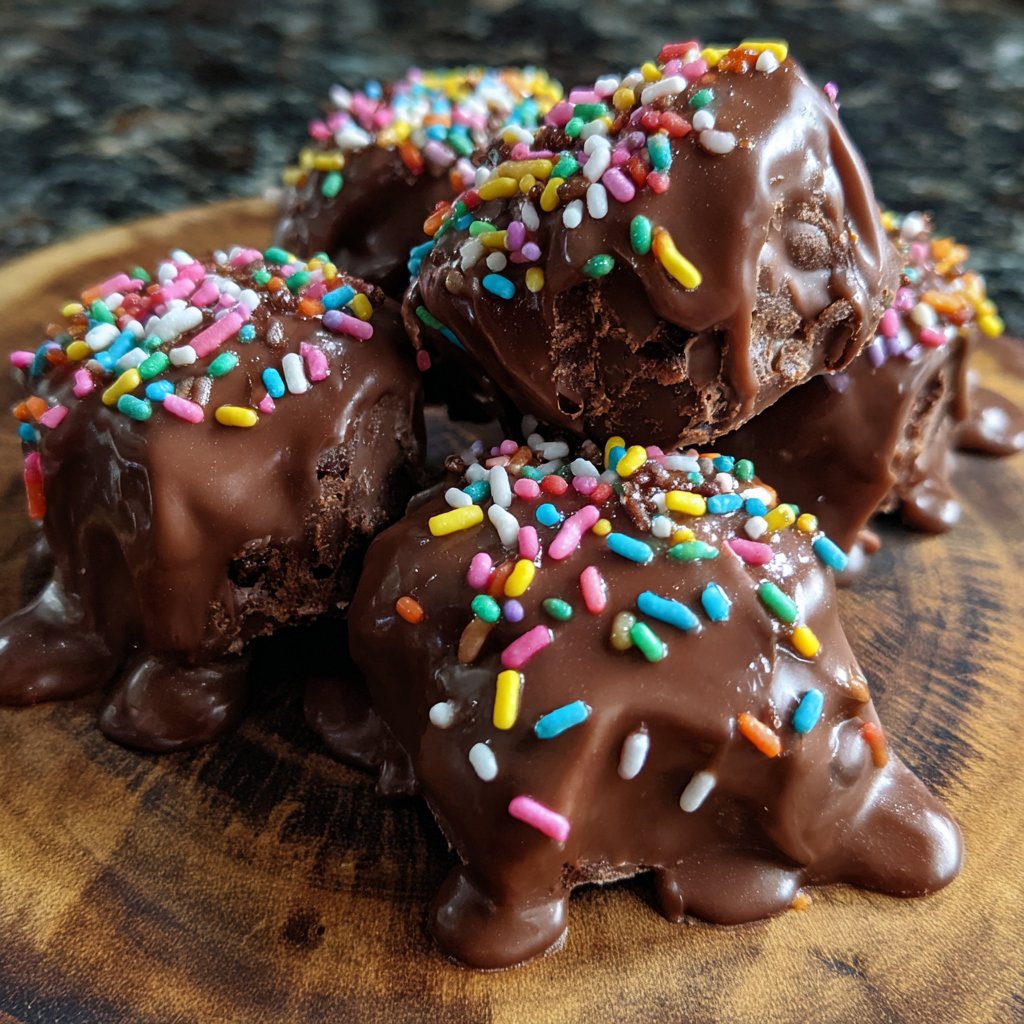
The toppings for your chocolate treats can elevate them from delicious to extraordinary. Consider using a sprinkle of flaky sea salt for a contrast to the sweet chocolate, or adding a drizzle of caramel for an indulgent twist. Nuts such as toasted almonds or pecans add a satisfying crunch. You can also experiment with fresh fruit like raspberries or strawberries, which provide a refreshing burst of flavor that pairs wonderfully with chocolate.
For a festive touch, you can modify the recipe to suit different occasions. If you're making these for a holiday party, try adding peppermint extract for a seasonal flavor or incorporating festive sprinkles on top once cooled. If you're feeling adventurous, half the batter for a chocolate brownie base and swirl in a cheesecake mixture before baking. The possibilities are endless, allowing you to create something unique each time.
Ingredients
Gather these simple ingredients to get started on your chocolate treats:
Ingredients
- 200g dark chocolate, chopped
- 100g unsalted butter
- 1 cup granulated sugar
- 2 large eggs
- 1 cup all-purpose flour
- 1 tsp vanilla extract
- 1/2 tsp baking powder
- 1/4 tsp salt
- Toppings (optional): caramel, sea salt, nuts
Make sure all your ingredients are at room temperature for the best results.
Instructions
Follow these simple steps to create your chocolate treats:
Melt the Chocolate and Butter
In a heavy saucepan, melt the dark chocolate and butter over low heat. Stir continuously until smooth, then remove from heat and let it cool slightly.
Combine the Mixture
In a mixing bowl, combine the sugar and eggs, whisking until pale and fluffy. Gradually add the melted chocolate mixture until well combined.
Add Dry Ingredients
Sift together flour, baking powder, and salt. Gently fold these dry ingredients into the chocolate mixture until just combined.
Bake the Treats
Pour the batter into a greased baking pan and smooth it out. Bake in a preheated oven at 350°F (175°C) for about 15 minutes, or until a toothpick comes out clean.
Cool and Top
Allow to cool in the pan for about 10 minutes. Once cooled, cut into squares and add your favorite toppings if desired.
Enjoy your delicious chocolate treats with a glass of milk or coffee!
Pro Tips
- For an extra touch, consider mixing in some chocolate chips or chopped nuts into the batter before baking.
Storing and Freezing
Storing your chocolate treats correctly will help maintain their freshness. Allow them to cool completely, then store in an airtight container at room temperature for up to three days. If you need to store them longer, consider refrigerating them, which can extend their lifespan to about a week but may slightly change the texture. Ensure they're in a sealed container to prevent them from absorbing moisture and flavors from your fridge.
For longer storage, these treats freeze beautifully! Cut them into squares and layer them between parchment paper in a freezer-safe bag or container. They can last up to three months in the freezer. When ready to enjoy, simply thaw them at room temperature or microwave them for a few seconds for that fresh-baked feel.
Serving Suggestions
When it comes to serving your chocolate treats, presentation matters. If you're bringing them to a gathering, consider arranging them on a festive platter and adding fresh fruits or a sprinkle of extra sea salt on top to enhance visual appeal. Pair them with a scoop of vanilla ice cream or whipped cream for a decadent dessert experience while the treats are still warm.
You can also personalize servings by cutting the treats into different shapes for various occasions. Use cookie cutters to create fun shapes for birthday parties, or keep them in the classic squares for a more sophisticated appeal. These chocolate delights can be a wonderful addition to dessert tables or party bags as well!
Questions About Recipes
→ Can I use white chocolate instead of dark chocolate?
Yes, but it will change the flavor profile, making it sweeter and less rich.
→ How can I store leftover treats?
Store in an airtight container at room temperature for up to 5 days.
→ Can I make these gluten-free?
Absolutely! Replace the all-purpose flour with a gluten-free flour blend.
→ What variations can I try with toppings?
You can use crushed cookies, dried fruits, or even flavored syrups to personalize your treats!
Chocolate Treats for Any Occasion
What You'll Need
Ingredients
- 200g dark chocolate, chopped
- 100g unsalted butter
- 1 cup granulated sugar
- 2 large eggs
- 1 cup all-purpose flour
- 1 tsp vanilla extract
- 1/2 tsp baking powder
- 1/4 tsp salt
- Toppings (optional): caramel, sea salt, nuts
How-To Steps
In a heavy saucepan, melt the dark chocolate and butter over low heat. Stir continuously until smooth, then remove from heat and let it cool slightly.
In a mixing bowl, combine the sugar and eggs, whisking until pale and fluffy. Gradually add the melted chocolate mixture until well combined.
Sift together flour, baking powder, and salt. Gently fold these dry ingredients into the chocolate mixture until just combined.
Pour the batter into a greased baking pan and smooth it out. Bake in a preheated oven at 350°F (175°C) for about 15 minutes, or until a toothpick comes out clean.
Allow to cool in the pan for about 10 minutes. Once cooled, cut into squares and add your favorite toppings if desired.
Extra Tips
- For an extra touch, consider mixing in some chocolate chips or chopped nuts into the batter before baking.
Nutritional Breakdown (Per Serving)
- Calories: 250 kcal
- Total Fat: 16g
- Saturated Fat: 10g
- Cholesterol: 70mg
- Sodium: 50mg
- Total Carbohydrates: 28g
- Dietary Fiber: 2g
- Sugars: 22g
- Protein: 3g